UpdateBIM can use groups of Revit.
The groups have a special process for inserting. You need to pay attention when the group is not loaded in the project.
The first time when inserting a group in the project, the program can´t use the API for work and you need to use the data in the clipboard to load.
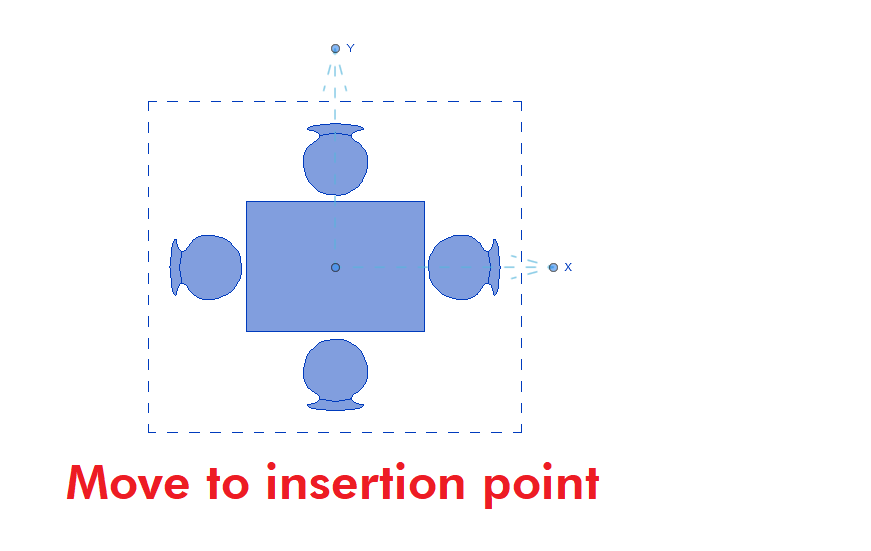
When is loaded, the process is simple, select the group, the program is inset in the center of the project and you need to move at the desired insertion point.
Revit Interface
When you go to Cloud Access, you can see the different objects to insert. In the case of groups, these special objects have the color of the band in blue, like can you see in the next image:

Besides the blue color of the band, when you select it, not show the types, show a special button "Load Group in Project", and a message about the process to load.
When you click on the button "Load Group in Project", the program launches the Revit command "load as a group", as can you see in the next image:
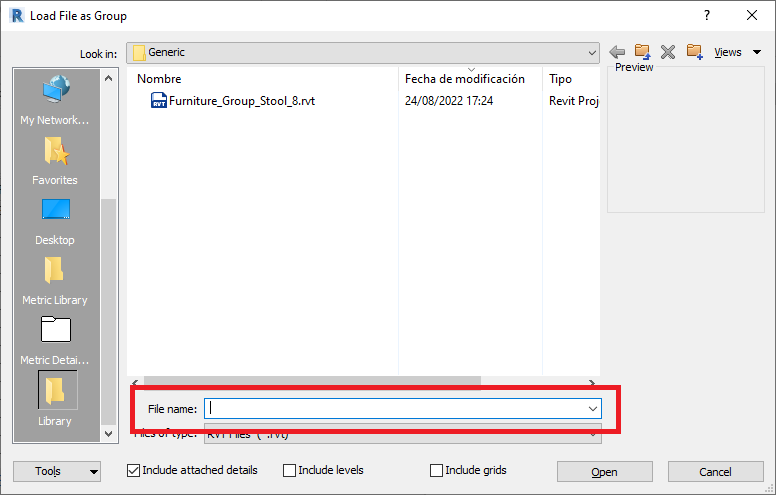
And the focus goes to the "File Name" in the Load as Group Form.
UpdateBIM put the information about the file name in the Clipboard, you need to use ctrl+V to place the correct data in the form.
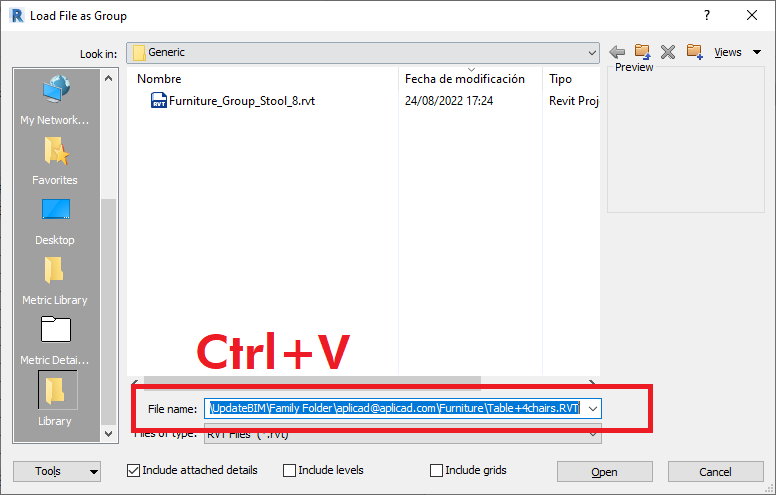
Click on the "Open" button or press the key "Enter" to complete the load as a group process.
When the process is done, the form of Cloud Access changed and shows the button Insert Group.
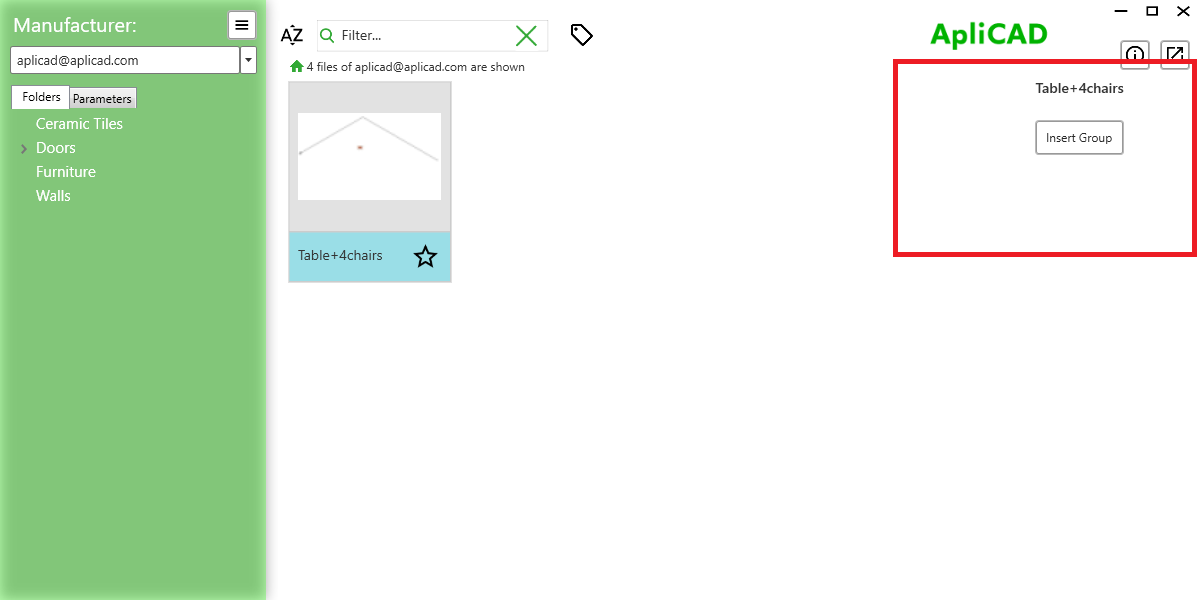
If you click on the button "Insert Group", the program places the group in the 0,0 point in the project, selects the group, and starts the command move to place the group in the desired insertion point.